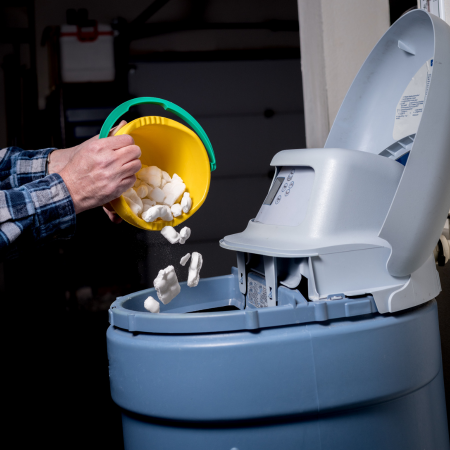
Once a year, when it comes to clearing out the Water Softener, it has always been a laborious task that we try to hold off as long as possible.
Now though, maintaining your water softener is as easy as ever, as our experts at City Plumbing have compiled a helpful guide to make the process less daunting and stress-free so you can ensure your Water Softener will continue to work for years to come.
Step 1: Maintain the Brine Tank
The salt in your Water Softener is a crucial part of the softening process, as it regenerates the resin beads to help prepare them for subsequent use. It is imperative to regularly check the salt levels in your Water Softener; as a general rule, it's best to check once a month so that your water softener can work as effectively as possible.
In order to correctly maintain the brine tank on your water softener, consider these steps;
- Check your Water Softener manual to see whether the unit runs on granular, tablet, or block salt. Granular salt is the most common type because it can dissolve most easily.
- Fill the tank halfway with salt, keeping approximately at least 3 inches above the water level.
- Over time salt can form a solid layer in your system, preventing loose salt from mixing with the water. The best method is to pour hot water over the salt bridge and use a broom handle to push around the centre several times to break up the solid layers.
- Salt can also form a mushy pile at the bottom, which will cause the water to rinse around it instead of mixing in. You can easily break this up with a long stick or take out some of the salt pile and mix it into hot water to dissolve it in and then pour it back into the unit.


Step 2: Clean the Tank
Most Water Softeners that have a salt tank can go approximately four to five years without cleaning, but it is good practice to clean out your water softener annually to maximise its working potential.
Cleaning out your Water Softener is easy and can be done by following these steps.
1. Emptying the tank - To do this, use the bypass valve to shut off the water intake and clear out all the salt and water from the system.
2. Remove the brine grid from the base of the tank and set this aside.
3. Use a generous amount of washing-up liquid and mix it into 4-8 litres of water to scrub the entire tank interior.
4. Once cleaned, pour old soapy water and then rinse off with clear water to remove any leftover debris.
5. Once the tank is all cleared, mix roughly 60ml of bleach into approximately 8 litres of water. Let the mixture sit so it can sanitise the tank. This helps to ensure no unwanted organisms grow on the inner surface.
6. Lastly, rinse the bleach thoroughly and replenish the tank with water and salt as usual. It is ideal to allow a couple of hours for the salt to dissolve before regenerating the tank.
If you own a salt-free water tank, you typically don't need to clean it as frequently, but it's recommended to do so annually. You can easily do this by shutting off the water intake and draining all the water from the tank.
Then use hot soapy water to scrub away any potassium chloride that has built up from inside the tank.
Step 3: Flush the Water Softener
Every few months, it's recommended to flush out the Water Softener with a cleaner. You can pour the cleaner straight into the brine tank and manually start a regeneration cycle; this will allow the resin to keep working efficiently.
Note that if the water in the tank has high iron levels, then it's ideal to use a strong cleaner to keep it functional.

Step 4: Essential Valve Upkeep
Once a month, exercise the valves to keep them in good working order. Start by cutting the water supply temporarily by adjusting the bypass valve. Next, turn off the outtake and intake valves and then turn them back to the on position. Lastly, turn the bypass valve back to its original place.

Step 5: Check the Venturi Valve
The Venturi Valve and the nozzle sit between the resin and brine tank, which creates a suction that pulls water in to regenerate the system. This can, on occasion, get clogged. Disassembling and cleaning these parts about twice a year is ideal to prevent the tank from clogging.
It is crucial that you follow the manual or seek advice from the manufacturer, as failing to relieve water pressure before disassembling the valve could damage parts or cause injury.

Whether you’re a homeowner or a professional plumber, follow these easy measures to ensure any Water Softener will function well for years to come.
If you require additional advice, then get in touch with our support team or contact your local City Plumbing branch. We have a vast variety of Water Softeners available - with next-day delivery and click-and-collect options available.
Other articles

Water Softener FAQs and Guidance
01 Sep 2023 ・ 6 mins

How to install a Water Softener: Step by Step
10 Aug 2023 ・ 5 mins

World Water Week 2023
21 Aug 2023 ・ 5 mins

Top 5 Hygiene Products To Help Prevent Legionella
12 May 2023 ・ 5 mins


