


Log In / Register
Basket
 Free delivery on orders over £75 ex VAT
 Free click & collect from branches nationwide
 Buy now, pay later interest free
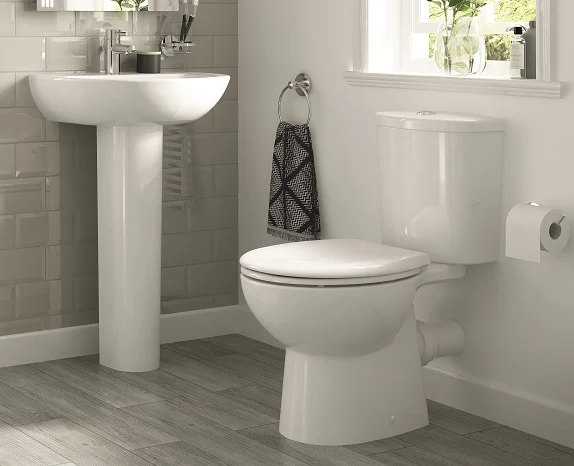
Though a task that most people put off, replacing a toilet seat is often a job that many homeowners will be required to do at some point.
Understandably over time, toilet seats become worn out, cracked, or stained. Not only does this look unsightly, but it can also be unhygienic. Yet, a simple but effective maintenance task, replacing these seats not only improves the aesthetics of the bathroom but also ensures an improved experience for all users.
At City Plumbing, we stock a huge range of quality toilet seats at fantastically low prices. This ensures you can replace an old or broken seat swiftly while helping homeowners keep their bathrooms functioning
The Importance of a Good Quality Toilet Seat
The toilet seat may seem like a small and insignificant part of the bathroom, but it plays a crucial role in both the functionality and design of this space.
A worn-out or outdated toilet seat can detract from the overall look of a bathroom, making it appear old and neglected. On the other hand, a new and stylish toilet seat can instantly elevate the appearance of your bathroom, giving it a fresh and modern feel.
Additionally, a broken toilet seat is not the nicest experience for anyone using this space regularly. So by making a quick new replacement here, using the toilet becomes a more comfortable experience for everyone!
Help Homeowners Choose the Perfect Toilet Seat
Those in the trade can greatly help customers select the best choice of toilet seat replacement. By taking into account several key tips, such knowledge will ensure your customer selects the best toilet seat to suit their needs and preferences.
- Consider the size and shape of the toilet bowl to ensure a proper fit.
- Encourage homeowners to think about the overall style and aesthetic of the bathroom when selecting a design.
- Promote those features such as soft-close lids and quick-release hinges for added convenience.
- Take measurements of the toilet seat before purchasing to ensure a precise fit.
Shop Toilet Seats at City Plumbing
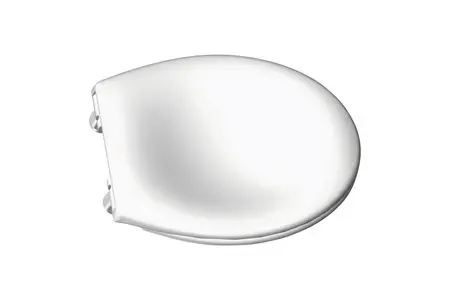
Beautifully finished, this crisp white toilet seat offers spectacular styling yet all the while at affordable pricing.
Featuring stainless steel hinges, this toilet seat has a soft close mechanism and is supplied with all the relevant fittings.
Providing a quick release for easy cleaning, the iflo Cascada toilet seat promotes ease of installation through its top-fix fittings.
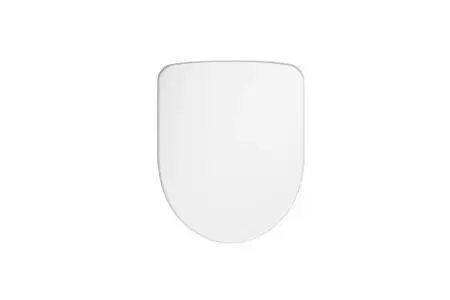
Designed for universal pans, this durable oval white toilet seat benefits from a thermoplastic construction, ensuring increased durability.
With a patented fixing system and adjustable plastic hinges, the Carrara & Matta toilet seat ensures a toilet seat that remains fitted to the pan!
Featuring hygienic Duroplast material, this round soft close modern white toilet seat is wonderfully crafted for increased durability. Top fixing metal hinges and a hidden ring with wrap-over design perfectly finish the iflo Denia toilet seat further ensuring an easy maintenance choice.
Constructed using Duroplast material, this soft white oval toilet seat from Twyford is completed with a glossy finish. Featuring a toilet seat and cover, this model offers a metal bottom fix stainless steel hinge and a soft closing mechanism.
Easy Installation and Maintenance
One of the great advantages of upgrading a toilet seat is how simple and quick the installation process can be. Most toilet seats can be easily installed with just a few basic tools, allowing a transformation of the bathroom in no time.
Step-by-Step Guide to Replacing a Toilet Seat
1. Gather Your Tools
Before starting the replacement process, make sure you have all the necessary tools to hand. This may include a screwdriver, an adjustable wrench, and the new toilet seat. It's essential to double-check the size and shape of the current toilet seat to ensure that you purchase the correct replacement.
2. Remove the Old Toilet Seat
Start by lifting the toilet seat lid and locating the screws that attach the seat to the toilet bowl. Using a screwdriver, loosen these screws and carefully remove the old toilet seat. Be mindful of any nuts or bolts that may need to be unscrewed as well.
3. Clean the Toilet Bowl
Once the old toilet seat has been removed, take this opportunity to thoroughly clean the toilet bowl and surrounding area. Use a mild cleaning solution and a cloth to remove any dirt or grime that may have accumulated over time.
4. Install the New Toilet Seat
Position the new toilet seat on the toilet bowl, lining up the screw holes with the mounting holes on the bowl. Secure the seat in place by tightening the screws or bolts using a screwdriver or adjustable wrench. Make sure the seat is securely fastened to prevent any wobbling or movement.
5. Test the Seat
After installing the new toilet seat, give it a test run to ensure that it opens and closes smoothly and securely. Sit on the seat to check for stability and comfort. Make any necessary adjustments as needed.
A New Toilet Seat Can Easily Give the Bathroom an Instant Uplift
Such a simple task, a new toilet seat can offer both an impressive and effective solution to the bathroom space.
With a wide variety of materials, styles, and features to choose from, you can easily find the perfect toilet seat to ensure a seamless and successful transformation of your customer's bathroom with just this one single upgrade.
If you’re looking to further help customers design and create their bathrooms, take a look at our City Plumbing website.
Help & Feedback
 Chat With Us
 Give Us Feedback